FTP Accounts allow you to upload and manage files on your hosting space. This article will show you how to create FTP Accounts for your hosting space.
First, you must login to the Easy Hosting Control website. Learn How.
From the Hosting Account screen as shown in Figure 1, select “FTP Accounts".
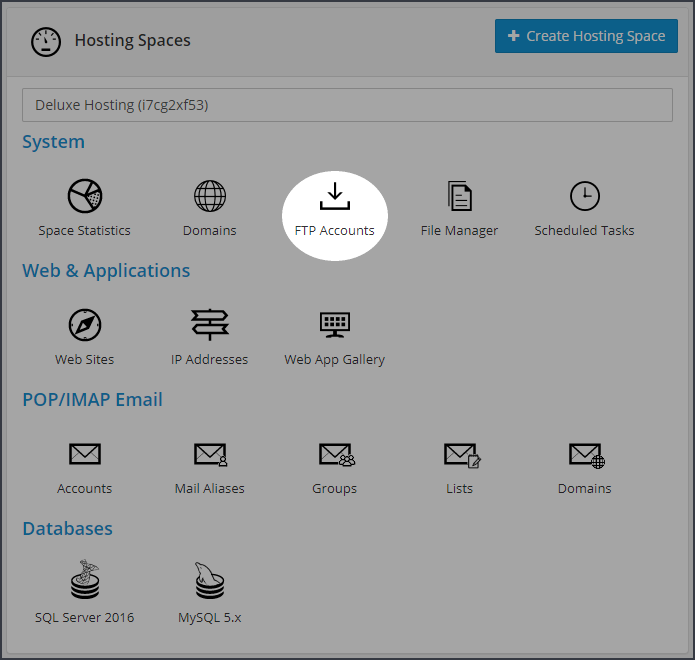
Figure 1
Creating FTP Accounts
The “FTP Accounts” screen, as shown in Figure 2, shows a list of all your FTP Accounts. Click the "Create FTP Account" button.
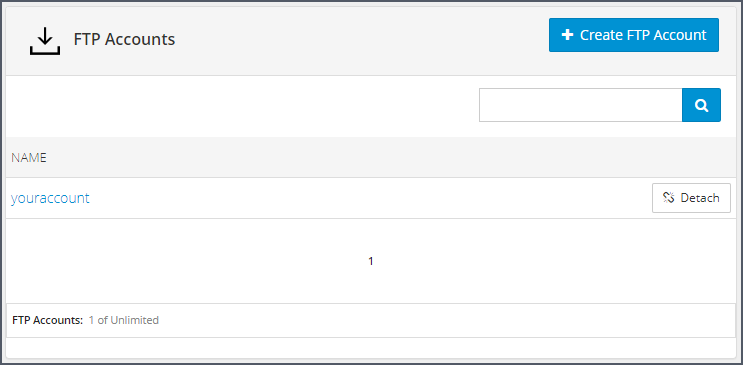
Figure 2
Enter the information for the new account on the "FTP Account Properties" screen, as shown in Figure 3.
You can use the "Generate Password" button to generate a password for the account. When the password has been generated, the password fields will fill up with dots. Click in one of the fields to see the generated password.
You can restrict the user to a specific folder within your hosting space by selecting it from the "Home folder" dropdown, as shown in Figure 4. Once you have entered all of the information, click the "Update" button.
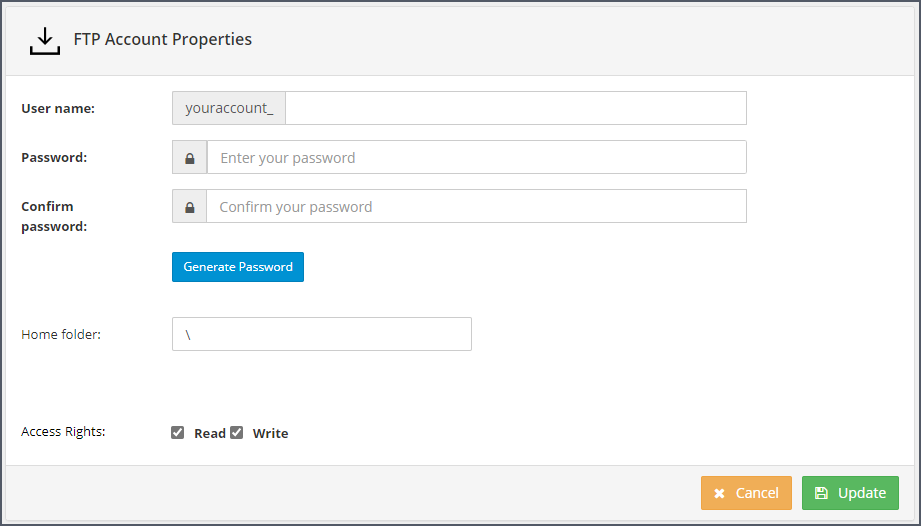
Figure 3
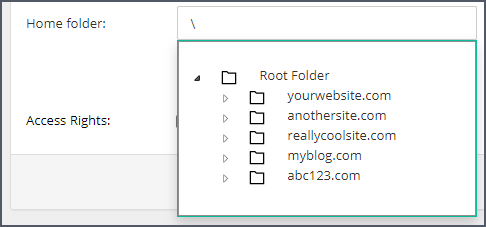
Figure 4
Managing FTP Accounts
The “FTP Accounts” screen, as shown in Figure 5, shows a list of all your FTP Accounts. Select the account you want to manage.

Figure 5
From the "FTP Account Properties" screen, as shown in Figure 6", make any changes you need to make and click the "Update" button. If you need to delete the account, simply click the "Delete" button.
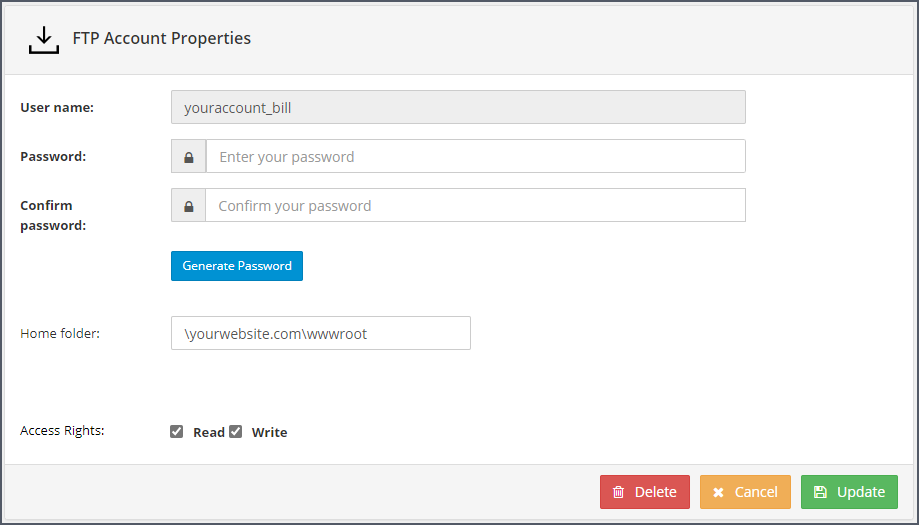
Figure 6

